Picking a generation mode
Your first decision when creating an assignment. Four modes, picked by what you have on hand — existing code, prose, or both. The right mode keeps generation fast and predictable; the wrong one wastes credits.
Written By Alan Gandy
Last updated 3 months ago
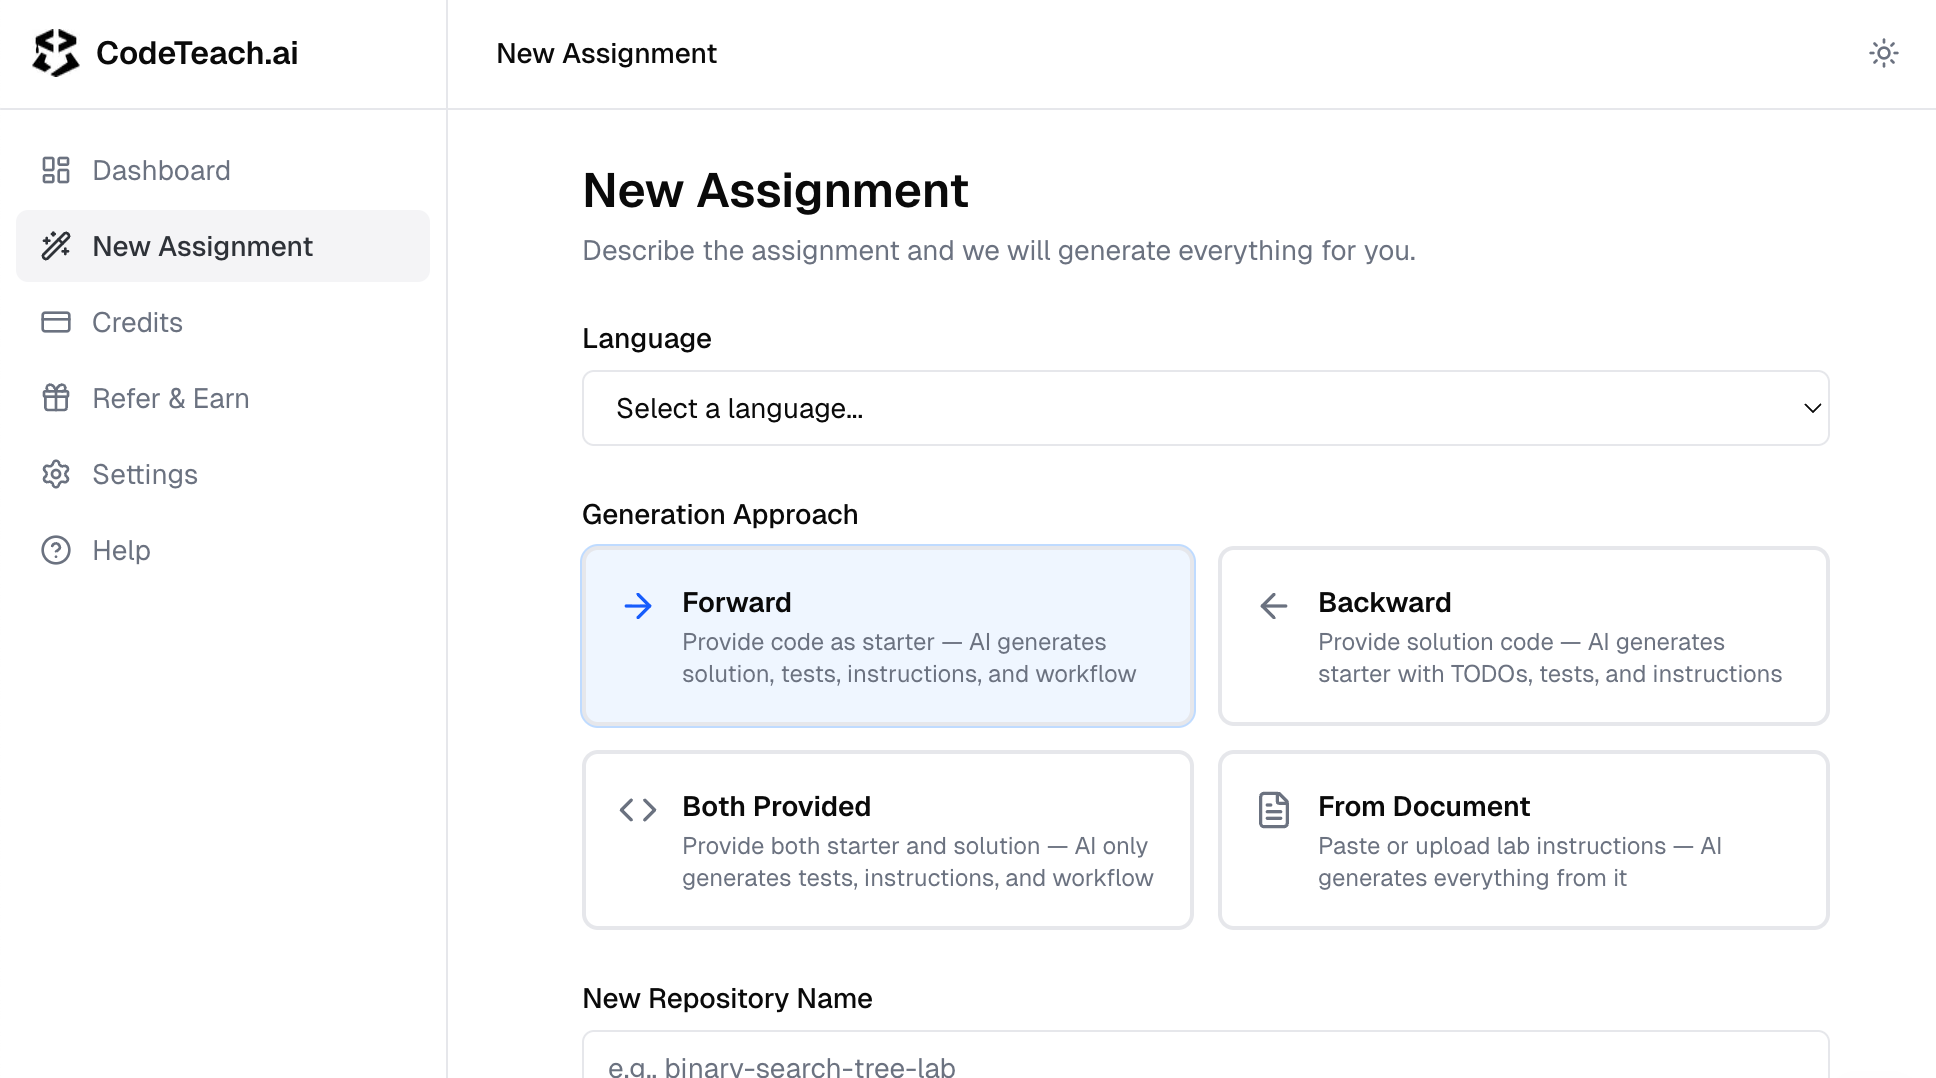
When you click New Assignment, the wizard's first big decision is the Generation Approach — four cards covering the four ways to seed an assignment. Pick by what you have on hand.
The decision tree
Work top-down — the first answer that's "yes" is your mode:
- Do you have starter code AND a working solution? → Both Provided. Highest fidelity, lowest AI freedom.
- Do you have only starter code with TODOs? → Forward. Fast and predictable.
- Do you have only a working solution? → Backward. AI strips it for you.
- Do you have only prose (description, lab handout, syllabus excerpt)? → From Document. AI builds everything.
If you have nothing on hand and want to spitball a fresh assignment, From Document is the right choice — type a one-paragraph description and let the AI scaffold it.
What each mode does
Every mode produces the same final output: starter, solution, tests, Instructions.md, and the GitHub Actions workflow. The difference is what you start with and how much creative latitude you give the AI.
When to pick each — quick gut-check
Forward — "I have the skeleton, fill it in." You wrote starter code last semester (or this morning); you want the AI to write the rest. Fast and predictable. Watch out: too-sparse starters (e.g., empty main()) leave the AI guessing at intent. Add a comment block at the top explaining the assignment.
Backward — "I have the answer, hide the answers." You have a working reference implementation and want it converted into a fill-in-the-blanks lab. Great for adapting your own code or a textbook example. Watch out: read the generated starter on the Review step — the AI may strip more or less than you'd want.
Both Provided — "I have everything except tests." You wrote both starter and solution by hand and just want the autograder + Instructions.md generated. Highest control, fastest generation (skips two AI steps). Watch out: the AI assumes your solution is correct — run it manually first, because tests get codified against whatever your solution actually outputs.
From Document — "I have a handout, build the assignment." You have prose (a paragraph or a full lab handout); the AI builds everything. Highest leverage, biggest interpretation risk. Watch out: vague documents produce vague assignments. The clearer your inputs/outputs, examples, and constraints, the better the result.
For deeper guidance on each, see the dedicated articles: Forward mode, Backward mode, Both Provided mode, From Document mode.
What every mode shares
Regardless of which card you pick, the rest of the form is the same:
- Language — Python, Java, C++, JavaScript, TypeScript, C, C#, Ruby, Go, Rust, SQL, or Jupyter Python
- Repository name — the name of the GitHub repo CodeTeach will create when you deploy. Use kebab-case with course code:
cs101-lab03-binary-search. - Difficulty — Beginner / Intermediate / Advanced. This is the most consequential setting in the form — it controls how much working code appears in the student-facing
Instructions.md. Read Choosing a difficulty level before picking. - Learning Objectives — comma-separated list (becomes a section in
Instructions.md) - Description — optional extra context for the AI ("use only standard library", "no recursion", "must support empty input"). Treated as a hard constraint during generation.
Where to go next
- Picked your mode? → Open the dedicated article for it (linked above) for mode-specific gotchas.
- Don't know which difficulty to pick? → Choosing a difficulty level — read this before clicking Generate. The level controls how much code appears in the student instructions, not just code complexity.
- Want to see what generation looks like in action? → Pick a mode, fill the form, click Generate. The wizard shows live progress for 1–3 minutes, then drops you on the Review screen.