Downloading the assignment ZIP
The Download ZIP button on the Deploy step packages your validated assignment as a ready-to-deploy zip file. This article explains what's inside, when to use it instead of automated GitHub deploy, and how to deploy manually from the ZIP.
Written By Alan Gandy
Last updated 3 months ago
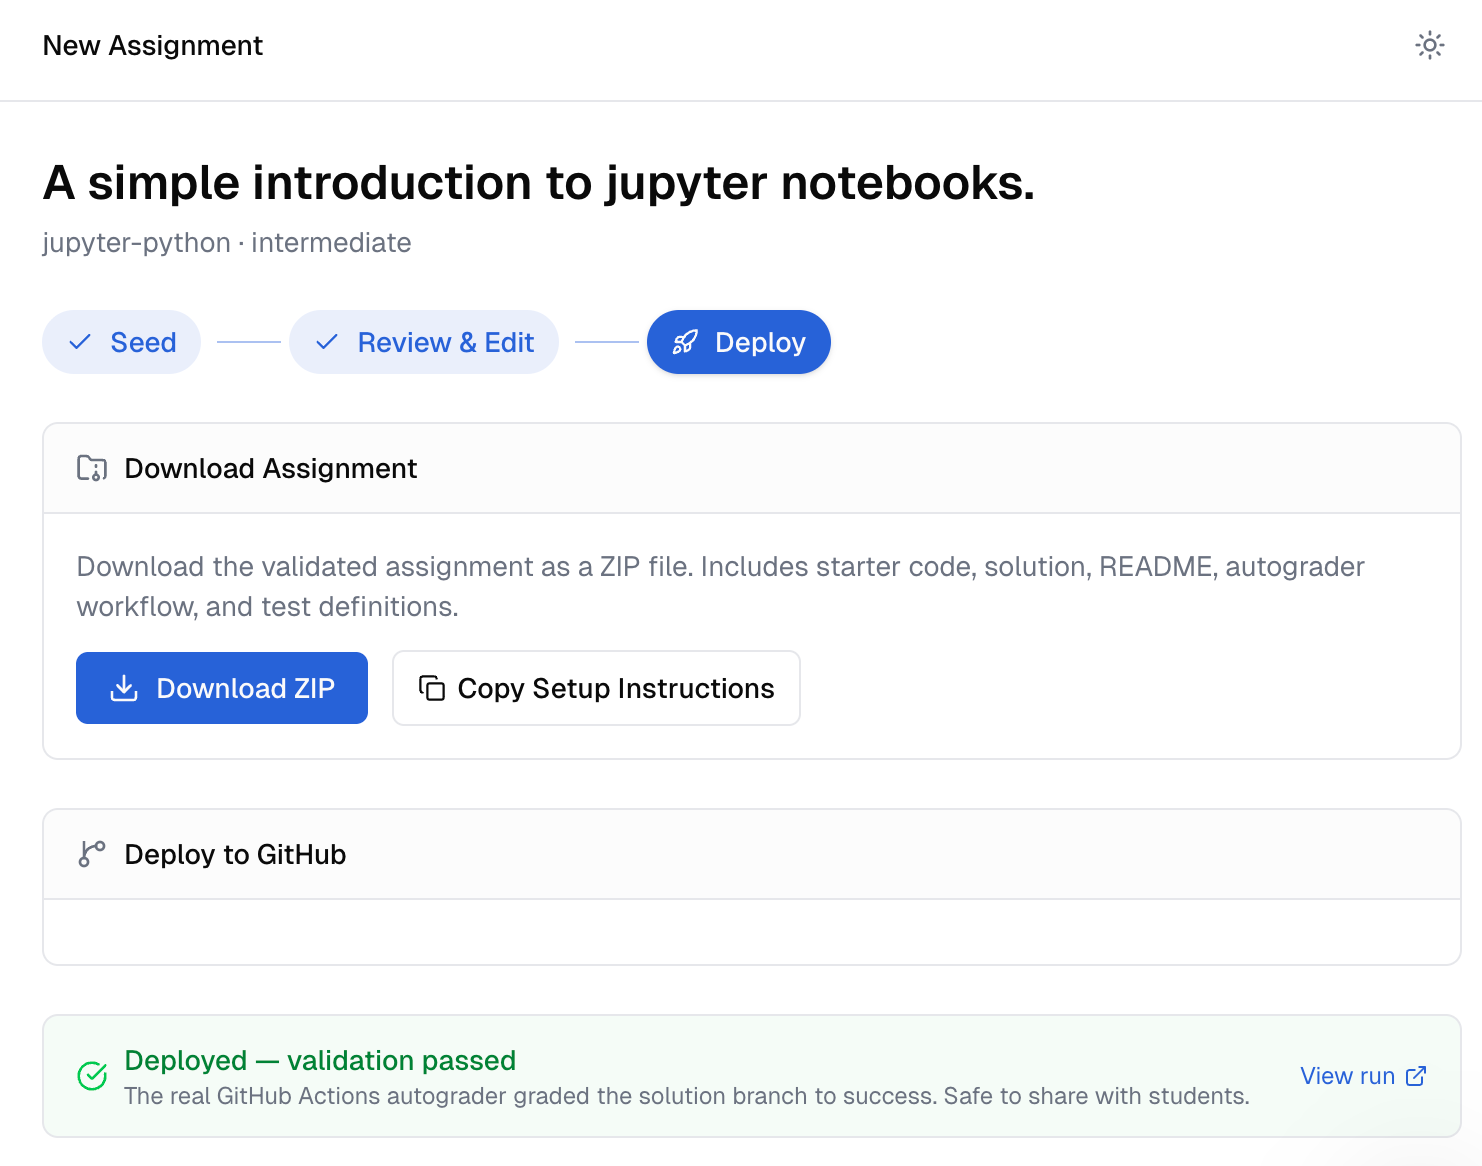
The Deploy step has a Download ZIP button alongside the GitHub deploy form. The ZIP packages your validated assignment as a ready-to-deploy archive. This article walks through what's inside, when to use it instead of CodeTeach's automated deploy, and how to manually deploy from it.
When the Download ZIP button is available
Only for assignments that have passed validation (status = validated or later). Before validation, downloading would hand you an unverified assignment — which defeats the whole point of the autograder check.
So the workflow is the same:
- Generate the assignment
- Review & Edit
- Approve instructions, run the autograder check (Tier 1 + Tier 2 must pass)
- Once
validated, both Download ZIP and Deploy to GitHub become available
What's inside the ZIP
A complete, ready-to-deploy assignment package:
your-repo-name.zip├── README.md # Generic orientation doc├── Instructions.md # Student-facing assignment description├── main.py (or whatever) # Starter code (top-level files)├── helpers.py # Additional starter files (if any)├── solution/ # Solution code (separate folder so it's clearly internal)│ ├── main.py│ └── helpers.py└── .github/ ├── workflows/ │ └── classroom.yml # The autograder workflow └── classroom/ └── autograding.json # Test definitionsFor Jupyter assignments, you also get .github/scripts/normalize_notebook.py and extract_notebook.py.
The starter files are at the top level; the solution lives in a solution/ folder so it's clearly separate. To deploy manually, you'd:
- Initialise a Git repo with the top-level contents on
main - Create a
solutionbranch - Move the contents of
solution/to the top level on thesolutionbranch - Push both branches to GitHub
The Copy Setup Instructions button next to Download ZIP gives you those exact steps as copy-pasteable shell commands, customised with your repo name. Paste into your terminal.
When to use the ZIP instead of automated deploy
You don't have admin access to a GitHub org
The CodeTeach App needs admin install rights on the org. If you're not the org owner and the owner won't install third-party apps, the ZIP is your only path.
You want to deploy to a non-GitHub host
CodeTeach only knows how to deploy to GitHub. If your school uses GitLab, Bitbucket, or self-hosted Gitea, download the ZIP and push there manually.
You want to customise the deploy
The automated deploy creates a fresh repo with default settings. If you want to:
- Add additional collaborators with specific permissions
- Add files that aren't part of the assignment (a
LICENSE, a custom.gitignore, aCONTRIBUTING.md) - Use a custom branch protection ruleset
- Add the repo to an existing parent (e.g., as a submodule)
…easier to do all of that manually. Download the ZIP, scaffold the repo your way, then push.
You're previewing an assignment before committing
The ZIP gives you a complete view of the assignment without using up an org repository name. Useful if you're between semesters and want to look at the workflow YAML offline.
Your CodeTeach deploy is failing repeatedly
Sometimes GitHub has eventual-consistency hiccups, the App install is in a weird state, or the org is configured oddly. The ZIP is your bypass — you can always deploy manually when the automated path is being grumpy.
Manual deploy step-by-step
If you choose to deploy from the ZIP:
# Unzipunzip your-repo-name.zipcd your-repo-name# Initialise Gitgit initgit add .git commit -m "Initial assignment"# Create the GitHub repo (via gh CLI)gh repo create your-org/your-repo-name --private --source=. --push# Switch to a new solution branchgit checkout -b solution# Move solution files to the top level on the solution branchcp -r solution/* .rm -rf solution/git add .git commit -m "Solution code"git push -u origin solution# Switch back to maingit checkout main# Mark it as a template repo (manual: GitHub UI → Settings → check "Template repository")The Copy Setup Instructions button generates this exact script with your repo name plugged in. Paste into your terminal.
Why does the solution end up in a separate branch?
GitHub Classroom forks the template repo at acceptance time. Without separation, the solution would be in every student's fork from day one. The autograder workflow checks out the solution branch only when grading (it runs in a different context than what students see), so the solution is invisible to students even though it's in the same repo.
Protected branch rules on the solution branch are an additional safeguard — set them up after manual deploy if you want belt-and-suspenders security.
What about the Classroom setup?
The ZIP only gives you the repo contents. After manual deploy, you still need to:
- Mark the repo as a template (GitHub repo Settings → check "Template repository")
- Go to GitHub Classroom → New Assignment
- Pick this repo as the template
- Configure protected paths, visibility, etc. — see Setting up your GitHub Classroom assignment for the full list
CodeTeach doesn't watch repos created from the ZIP — there's no post-push validation banner since CodeTeach doesn't know about the repo. You'll need to check the GitHub Actions tab on your repo manually after the first push.
Re-downloading later
The ZIP is regenerated fresh each time you click Download — it always reflects the current state of the assignment in CodeTeach. So if you edit the starter, regenerate tests, or modify Instructions.md after the first download, just download again to get the updated version.
Where to go next
- Manually deployed and ready to wire into Classroom? → Setting up your GitHub Classroom assignment — the steps are the same as automated deploy, just done by hand.
- Want to use the ZIP as a backup? → Download a copy alongside automated deploy. Belt-and-suspenders.
- Considering whether to use ZIP vs. automated deploy? → Default to automated unless one of the cases above applies. It's faster and the post-push validation banner is a real safety net.